
Removing wires from terminal block - Page 2
-
grog (original poster)

- Posts: 1807
- Joined: 12 years ago
I have no real interest in preserving the original wiring. I have plenty of modern wire that I've used in other rebuilds. The heating element is connected to the wiring in a manner I've not seen before, though. There aren't obvious terminals to pull off or unscrew as with most elements. It seems more permanently fixed to the terminal posts and I don't to wreck the element posts by blindly pulling on it. So for the time being I'm operating on the assumption that I may need to re-use the existing wiring. I'll look through Cuppajoe's restoration thread to see if I can determine how to detach the wires from the element.
LMWDP #514
-
grog (original poster)
- Posts: 1807
- Joined: 12 years ago
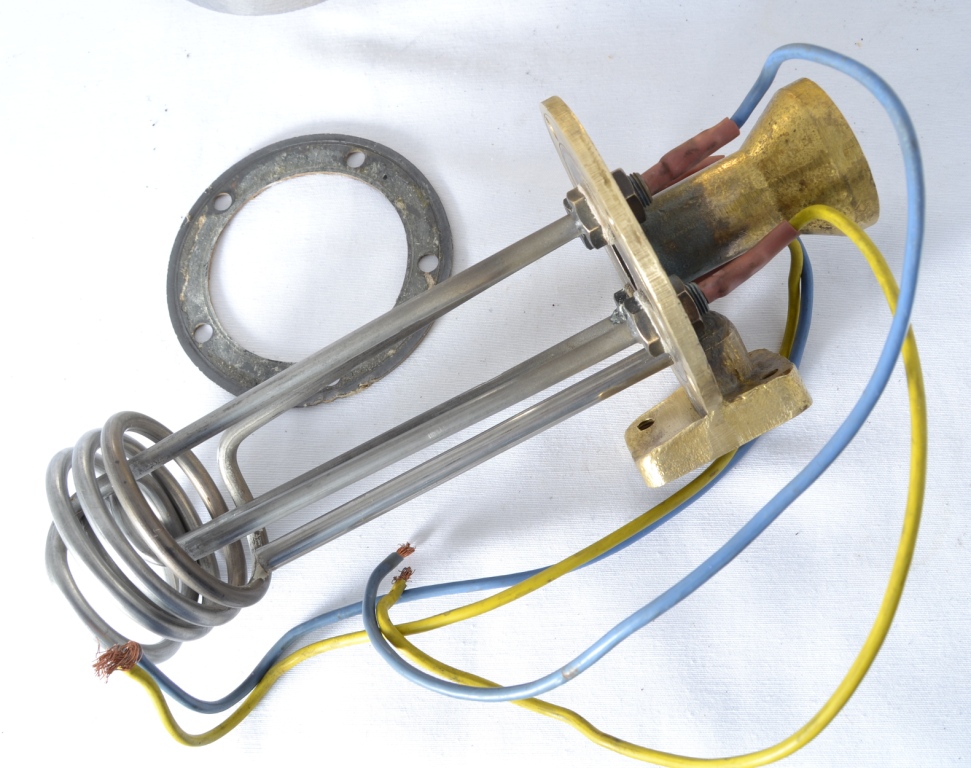
Here's a photo from Francesco's site that shows the element and unusual wire attachment:
http://www.francescoceccarelli.eu/Macch ... C_5711.JPG
http://www.francescoceccarelli.eu/Macch ... C_5711.JPG
LMWDP #514
-
dumpshot

- Supporter ♡
- Posts: 491
- Joined: 13 years ago
Grog - we are on the exact same page. I am rehabbing a La Graziella and am at the same sticking point. I carefully mangled one of the wires off and realized that it was a really bad idea. I was going to post this same question here in the next few days. It appears that the wires were crimped on something fierce. The crimp indented not only the wire end, but the post itself. So twisting off the wire isn't going to work. I was thinking of heating it up. But will that compromise the post as well? Here is a picture of two posts - one with wire crimped on and the one I got off.
Any thoughts from the peanut gallery?
Any thoughts from the peanut gallery?
LMWDP #484
-
OldNuc
- Posts: 2973
- Joined: 10 years ago
Cut the wire off so you can work on it and then take a dremel with a sanding drum of the largest diameter and coarsest grit and sand the side away from the crimp down until you can peel the now split sleeve off. Clean up the resulting stud and be sure to get that crimp indent clean as well. The standard yellow insulated butt crimp connector should be a snug fit on that pin and if not try a blue one. What you want is one that is tight even if it has to be slightly opened up. Once you find what fits then crimp it onto the pin with the point of your crimp tool over the existing indent. Now crimp your power lead and slide a heat shrink tube over it al, use high temp heat shrink. These can be silver soldered but you can end up failing the element so crimp is a safer bet here. This place has the high temp heat shrink: http://www.mouser.com/
Do not use a slip on pressure grip connector as the thermal cycling will cause the grip to loosen over time and then overheat and melt.
Once you find the butt connector that fits strip off the plastic sheath.
Do not use a slip on pressure grip connector as the thermal cycling will cause the grip to loosen over time and then overheat and melt.
Once you find the butt connector that fits strip off the plastic sheath.
-
dumpshot
- Supporter ♡
- Posts: 491
- Joined: 13 years ago
Thanks, Rich! I will create a restoration thread with photos for my project when I get some time to devote to it. I will follow your advice on this deal. Always appreciate your knowledge here on the forum.
Pete
Pete
LMWDP #484
-
okmed

- Posts: 309
- Joined: 13 years ago
Do a Google search for "hvac compressor terminal repair kit " and I think you will find that you can use it to connect new wires to the heating element terminals.
-
OldNuc
- Posts: 2973
- Joined: 10 years ago
Without actually knowing the size of the pin I suspect that a spark plug wire end crimp tool will make the crimp to hold it all together. If that becomes a non-starter it would be possible to thread each pin so a couple of nuts could be used to hold the wiring. Just depends on the physical size what will be the easiest.
HVAC compressors sometimes have the same arrangement but the physical size has to match or the connection is no good.
There is an electrical component called a split bolt connector which come in various physical sizes which will work as well as long as the physical space is adequate. They function the same way as the HVAC repair device but are slightly smaller, and easier to find.
