
Porlex Mini Handle Problem Solved
-
SatillaAltamaha
- Posts: 1
- Joined: 7 years ago
I've found the (old) Porlex Mini handle design to be infuriating (the 2016 and newer model has a new handle design) and I finally decided to do something about it. The modification I made works great and I joined this site in order to share it. I never take the time to share solutions on the internet, this the first time I have done so.I'm doing it because the handle flying off the Porlex mini is so aggravating.
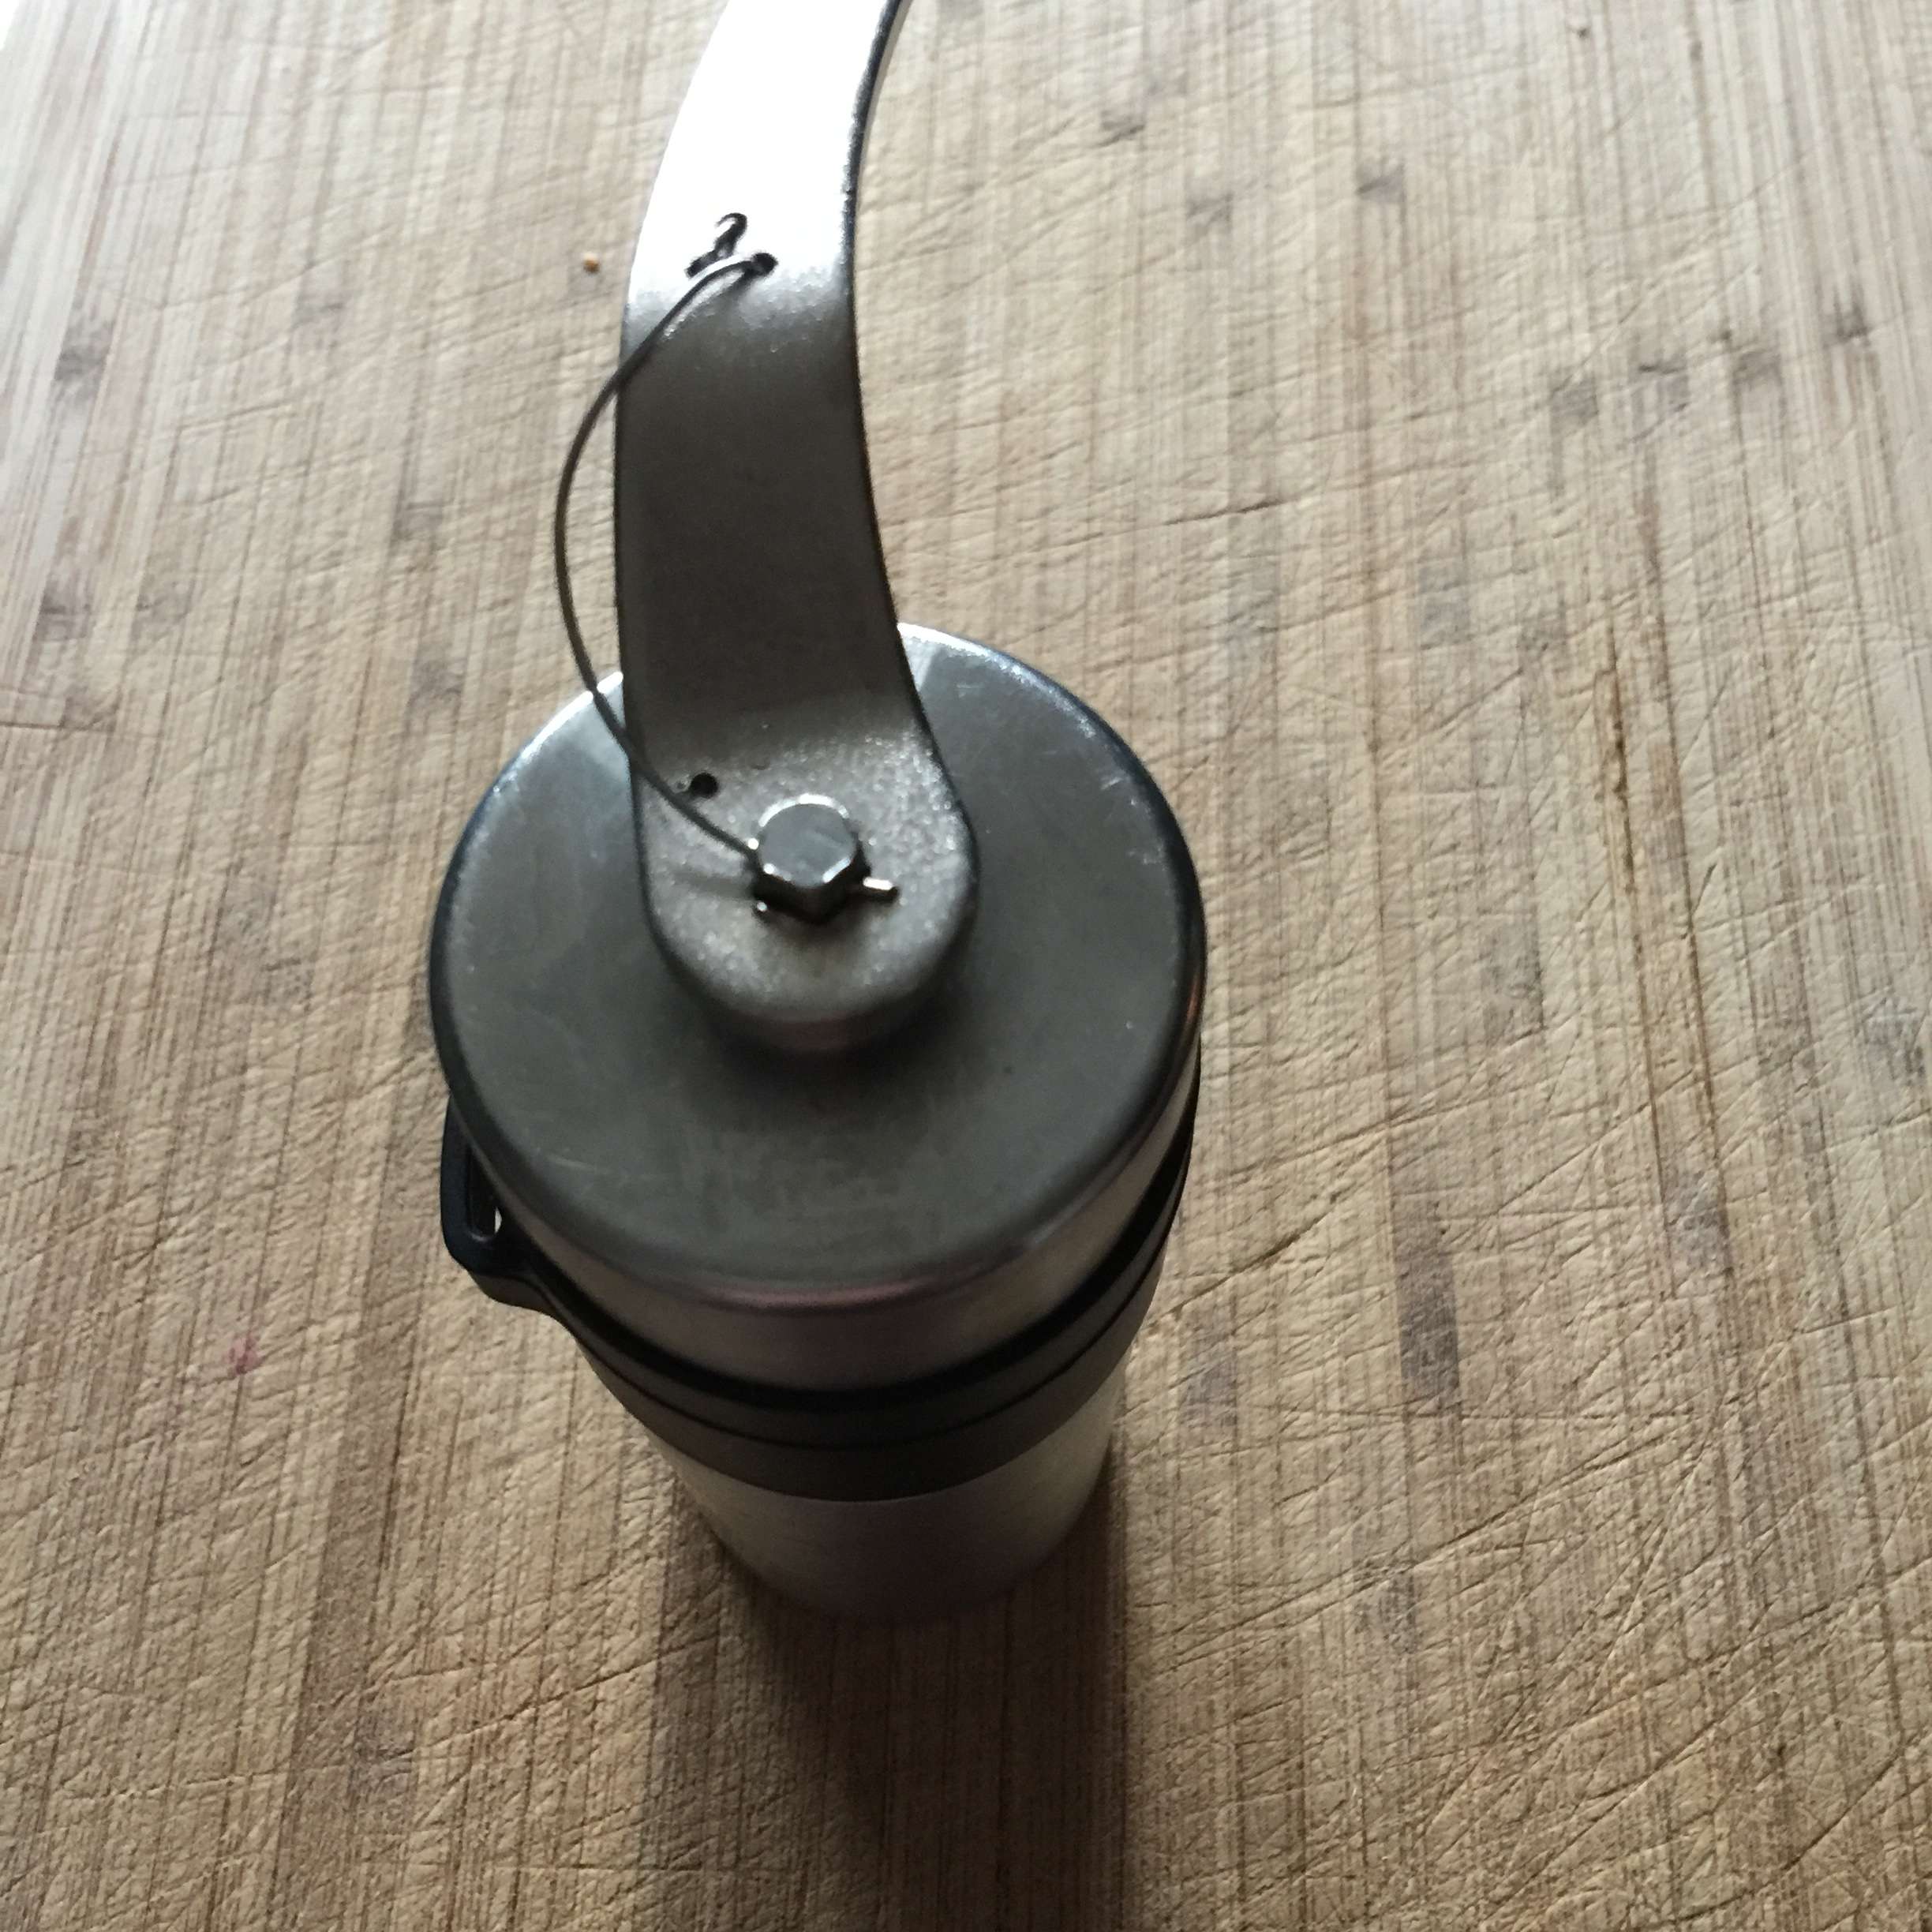
I drilled a hole through the penta shaft of my grinder just above where the handle sits. Use a .052" drill bit. The shaft is hard steel, so it will drill more easily with tapping oil, or if you don't have that, any oil even olive oil would be better than dry. I recommend punching the location with an awl/center-punch before drilling.
Next, drill three holes in the handle. The steel used in the handle is much softer and drills easily.
Then, use stainless steel music wire to form a spring pin that's attached to the handle through the three holes. This pin will go through the shaft and is quite easy to get in and out of the shaft for loading the grinder. You'll need pliers to manipulate and form the wire, it took me about three attempts before I got a form I was happy with, so you may need snips to remove your first attempt.
I wish I'd cooked up this solution ages ago, because it's a night-and-day difference. Than handle can't come off during use, and the grinder is pleasant to use now.
I took my grinder completely apart to drill the shaft, I put the shaft in a vise to drill it. However, I do think this could be done with the shaft in place. You might use an adjustable wrench to hold the shaft in place (keep it form rotating) while drilling.
I only drilled through the shaft at one face of the shaft, but, drilling through all five faces of the penta shaft would result in the most convenient setup. If all five faces were drilled, you wouldn't have to align the shaft with the wire--- any position would work. It's not much trouble to align, but it's an improvement worth considering. I'm not going to bother going back to make that change, but if I were making this modification over again I would drill all five faces.
Here's a shopping list:
Stainless Wire: McMaster-Carr #9495K76
Drill Bit: McMaster-Carr #2912A232
Optional, Center-Punch McMaster-Carr #3417A6-- Note,I'm not certain this one will fit with the shaft installed. I used McMaster #3422A5, which may have a finer lead in. If you are careful, slow, you probably don't need the punched mark to start the drilling, but it will make it a bit easier.
http://imageshack.com/a/img923/146/sNxrqR.jpg
http://imageshack.com/a/img921/4535/ZR4Xlp.jpg
I hope this helps someone.
-
Hurdygurdy
- Posts: 1
- Joined: 7 years ago
Thank you Satilla, I also never post on these kinds of discussion forums. I have been looking for solutions to this issue for years. I have tried straightening the handle, hammering the worn sections, welding stabilising prices to the top of the handle and most recently I flipped the skinny knob (see image). All the changes worked for a couple of weeks and then failed. I believe your solution might be the best I have seen! Next time I see my father-in-law, I will see if he can help me with this modification 
